Lets dive straight into setting up transactional replication in SQL Server 2005. If you want to learn what is transactional replication and about other models of replication please visit the following site:
http://msdn.microsoft.com/en-us/library/ms165713.aspx
The setup that I have here is 2 SQL Servers (both SQL Server 2005) which can talk to each other. It means the remote connections are enabled.
As part of replication, I am going to create a database (with 1 table) on SQL Server 1 and this table is being replicated to another database which is sitting on SQL Server 2. Let’s see how this could be achieved without any more documentation on this J
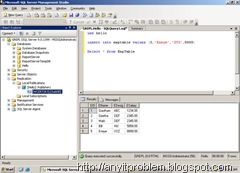
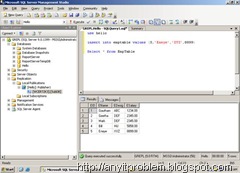
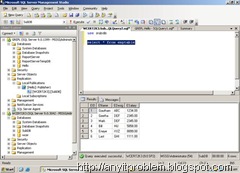
After you connect to SQL Server instance, have a look at the table data under Hello database.
Now we are trying to configure the distributor for replication process to happen.
Go to SQL Server Object Explorer –> Replication Node –> Right Click and click on Configure Distribution.
Now Distribution Wizard starts up. Lets see what all could be configured here.
Click on Next button. This takes us to Distributor page. Here there is an option to select the instance of SQL Server which will have the distribution database. By default the server on which the distribution wizard runs, is checked. In case if you have some other server where you want to setup distributor, keep the setting as it is.
Once the instance was selected, click on Next button. This will move you to the SQL Server Agent Start Screen. This screen talks about how will the SQL Server Agent Start (either automatically or manually)
Clicking on next button will take us to Snapshot folder.This snapshot folder does not support pull subscriptions created at the Subscriber. It is not a network path or it is a drive letter mapped to a network path. To support both push and pull subscriptions, use a network path to refer to this folder.(This is even shown as warning at the bottom of the installation screen)
Click Next. Now select the distribution database name. Also you have an option to select the path for both data file and log file for distribution database.
Click Next. Check both the boxes to generate the script for distributor. Once done click on Next button.
Here you have an option to select the location to save the above generated script.
Once selected, you are all set to see distributor being configured. Click on Finish button to complete the wizard.
Just see and enjoy now what happens…
Click on Close button.
Now lets go ahead with other stuff. Now open the SQL Server Object Browser and go have a look at the distributor properties.
The distribution database properties are viewed in the below screen. In case if you want to create a queue reader agent, you can create one.
Here’s the other part of replication.
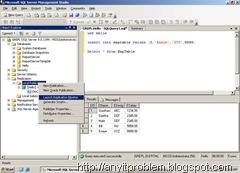
Configuring Publisher: Go to Object Explorer –> Drill down to Replication –> Right click on Local Publications and click on Publisher Properties.
Here you can see the properties of the publisher. Also the database that has to be published can be selected in this screen.
Go to Publication Database Node (in Publisher Properties window) and select the database that has to be published.
Once the Publication properties are setup, its time to create a new publisher. Traverse to Object Explorer –> Replication –> Local Publications –> Right click and select New Publication. This will start a new Publication Wizard.
This will invoke the Publication Wizard and will help you in creating a new Publication.
Click on Next button to select the publication database. Once done, go ahead with Next button.
Here select the type of replication that you want to configure. In this article lets go ahead with Transactional Replication.
In the New Publication Wizard, select the table that has to be published. Then there is an option to select the article properties as well. Don’t worry too much about what an article is… Its just any item that’s showing up on the left side pane. (right from table name to column name).If there are columns of data that you do not want to replicate, you can remove the columns from the published table by clearing the check box next to each column. One important thing to remember here is a table can appear among the Objects to publish only if SELECT permissions for the table have been granted directly to the replication administrative user. In case if there is any column which may loose data in case if it is published, it would be shown with a warning symbol.
Select the option as shown in the screen shot to see the properties on either highlighted articles or all articles.
Here you can see the properties of the article selected. Here there is an option to change the object properties. You can select all the options available as per your requirements.
Once done click on Ok and proceed to next screen. In case if any filter is to be applied click on Add button and add filters accordingly. Once done click on Next button to continue.
Select the first option in this page to create the snapshot immediately and be available for subscriptions.
On the next screen, go ahead and select the security settings on the Agent Security page. One thing here is to give proper permissions to both snapshot agent and LogReader Agent.
The user under which both the agents run should be a user which belong to sysadmin role. So make sure you have such a user(either windows or SQL User). In my case, I am giving it as admin user.
Here in this page, select the options to generate the script and in the next screen give the location to save the script.
Once done, give the publisher that you have created a name and click on Finish button to take a quick coffee break.
Ok.. We are back again.. after a refreshing break now.. :-) By this time you should have seen that a new folder named repldata has been created under %RootDrive%\Program Files\Microsoft SQL Server\MSSQL.1\
This folder has the replication data. The publisher that was created earlier can be seen here.
Now enough of this.. lets proceed….
Traverse to Replication folder and under Local Publications, you can see the new publication that you have created just now. (The name of my Publisher is Publisher1)
Right click on the publication created and launch Replication Monitor
Click on the publisher created and go to “Warnings and Messages” tab.
Here most important thing to verify is the status of Log Reader and Snapshot Agents. If you sense that either of the agents are having some problem then it should be due to the Security settings of the agents (that was configured some time back) (May be the user chosen to run the agents was not having enough permissions to run the agents). Also there could be a problem that the SQL Server Agent is not running on the Publisher machine.
In the lower pane, titled Agents and jobs related to this publication, verify that the status of the Log Reader Agent is Running.In the same pane, verify that status of the Snapshot Agent status is Running or Completed.
Double-click the Snapshot Agent row to open a dialog box that shows the history of the snapshot process.
Now that the publication has been created and the Snapshot Agent has been configured to pull data from the MS SQL database into a set of snapshot files, you will configure permissions for the Distribution Agent, which delivers changes to the SQL Server Subscriber. Make sure that there is a Windows user on the Distributor computer under which the Distribution Agent can run.
The snapshot files are stored in a snapshot folder. By default the snapshot folder is located at %RootDrive%\Program Files\Microsoft SQL Server\MSSQL.1\MSSQL\repldata\. Here configure the Windows share for this folder. The Windows user that runs the Distribution Agent must have read permissions on the share.
Now that the security settings are also done, go back to Object Explorer-> Publication Name –> Properties –> Go to Publication Access List. In case if you are using any specific user, please do add that user. I have added the administrator account as I am using that.
Now its time to create a subscription. For this we need to traverse to Publisher –> Right click and go to New Subscriptions.
This will start subscription Wizard.
The first screen asks us to select the publisher machine and the publisher name.
On the Distribution Agent Location page, select the location at which the Distribution Agents will run. In my case, I have push subscription from the machine on which distributor is configures.
On the Subscribers page, select the Subscriber instance that will receive the replicated data from the publisher that we have configured. The subscriber that I have chosen is one more SQL Server Instance named “WCERT2K3”. For this Click on “Add SQL Server Subscriber”. This will pop up SQL Server Instance on which Subscriber is to be configured.
The SQL Server on which Subscriber is to be created shows up here. Now click on “New Database” option to create a new database in the Subscriber Server.
Once created, the new DB shows up in the combo box.
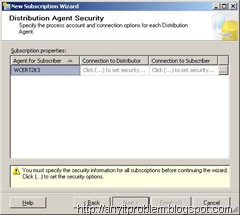
Click on Next button and clicking on “…” button will help you in configuring the account permissions for the subscriber.
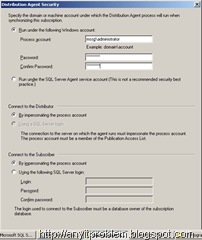
In the Distribution Agent Security dialog box, select the Windows user that you configured before you started the New Subscription Wizard.
In the Distribution Agent Security dialog box, select the Windows user that you configured before you started the New Subscription Wizard. The Windows user that you select must meet the following conditions:
The user is included in the PAL.
The user is a member of the db_owner fixed database role in the subscription database.
The user has read permissions on the snapshot share.
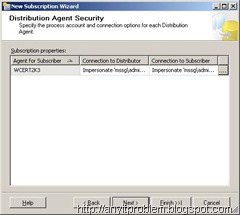
Once giving the credentials is done, go ahead and click on Next button.
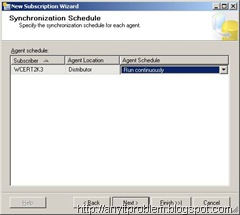
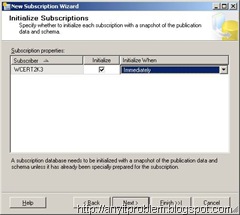
Select Run Continuously from the combo box and click on Next button.
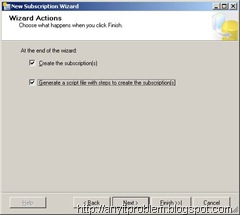
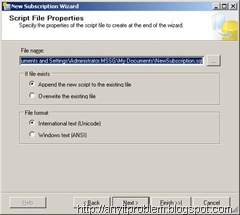
In the Wizard Actions screen, check both the options so that script is generated and saved at the given location.
Click Next.
Click Next.
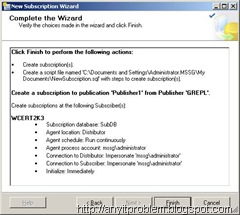
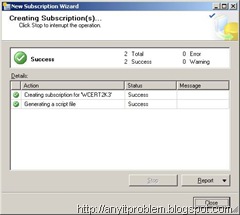
Click on Finish button and relax now..
Now go to SQL Server Object Explorer –> Replication –> Local Publications –> Publisher1 –> Subscriber (This is the one that we have created above)
Go to Replication Monitor to see how things have changed from what we have seen before. (Remember that we have seen Replication Monitor after Publisher was created)
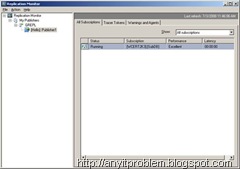
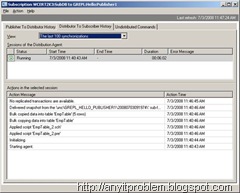
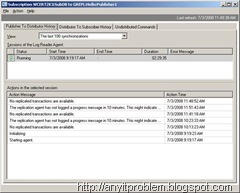
Drill down to publisher node and you will see that the subscriber is setup correctly and status is also excellent under “All Subscriptions” tab. Double click on the subscription to open the properties.
The latency column tells the time taken for data to replicate from one SQL Server to other and a relative rating of this performance is listed in the Performance column. Since initial snapshots take more time to generate and deliver than the incremental changes, the initial latency is typically much greater than the latency for incremental changes.
Here you can have a look at the other tabs as well.
Latency between the Publisher and Subscriber is calculated by measuring two intervals in replication processing:
1. The time that is required from when a change is made at the Publisher until the Log Reader Agent delivers the change to the distribution database.
2. The time that is required for the Distribution Agent to deliver the change from the distribution database to the subscriber.
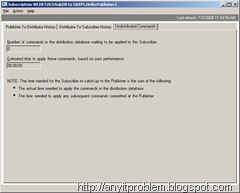
The Undistributed Commands tab displays information about the number of commands in the distribution database that have not been delivered to the selected Subscriber, and the estimated time to deliver those commands.
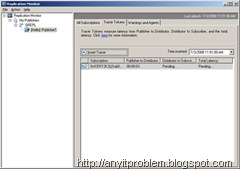
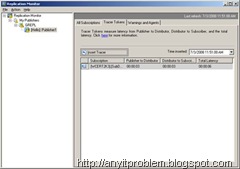
Tracer tokens are used to diagnose the current performance of transactional replication. A token, which is a small amount of data, is written to the transaction log of the publication database, marked as if it were a typical replicated transaction, and then sent through the system. The elapsed time is then measured.You can create and monitor tracer tokens by using Replication Monitor.
1. In Replication Monitor, click the Tracer Tokens tab.
2. Click Insert Tracer.
After a short time, Replication Monitor displays three numbers as indicators of transactional replication performance: the time to replicate the tracer token from the publication database to the distribution database; the time to replicate the tracer token from the distribution database to the subscription database; and the total elapsed time. If one of the agents is stopped and the tracer cannot be replicated, Replication Monitor displays Pending until the agent is restarted. Verify that a value is displayed in the Total Latency column.
Close Replication Monitor.
Now lets see if the replication that we have setup… is working fine or not.
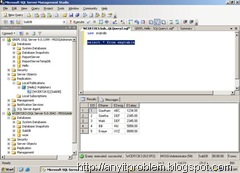
Now I have connected to the other instance and have checked, if the same data as in EmpTable (on Server 1) does exist on EmpTable (on Server 2). Yep… I am able to see the data.. So the replication is working fine. Lets check it again by inserting some data in EmpTable (Server 1) and lets see if the same gets replicated on Server 2 EmpTable as well.
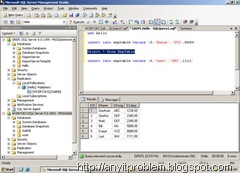
Now go back to Server 1 EmpTable and insert a row. See if the row is appended or not in EmpTable in Server 1.
Now lets check if the same data is seen on EmpTable in Server 2 or not.
Hurrayyyyyyy !!!!!!! We are able to see the data…
Thanks for going through the long post. Hope this was helpful to you. Please post your comments on the blog and you can also reach us at anyhelpinit@gmail.com
![clip_image002[6] clip_image002[6]](http://lh3.ggpht.com/anyhelpinit/SGzAvWQhGlI/AAAAAAAAAkU/2im47mGt1rc/clip_image0026_thumb%5B8%5D.jpg?imgmax=800)
![clip_image004[6] clip_image004[6]](http://lh6.ggpht.com/anyhelpinit/SGzAx096ruI/AAAAAAAAAkc/LHc1rML_Tgc/clip_image0046_thumb%5B14%5D.jpg?imgmax=800)
![clip_image006[4] clip_image006[4]](http://lh6.ggpht.com/anyhelpinit/SGzAz4GqpkI/AAAAAAAAAkk/rOsyHc04vpM/clip_image0064_thumb%5B4%5D.jpg?imgmax=800)
![clip_image008[4] clip_image008[4]](http://lh5.ggpht.com/anyhelpinit/SGzA1vT2rTI/AAAAAAAAAks/fzN39QN5v8Q/clip_image0084_thumb%5B4%5D.jpg?imgmax=800)
![clip_image010[4] clip_image010[4]](http://lh5.ggpht.com/anyhelpinit/SGzA3MHclPI/AAAAAAAAAk0/bjQd4WPiEoE/clip_image0104_thumb%5B4%5D.jpg?imgmax=800)
![clip_image012[4] clip_image012[4]](http://lh3.ggpht.com/anyhelpinit/SGzA47VPmfI/AAAAAAAAAk8/3ZfuJGPa7EY/clip_image0124_thumb%5B4%5D.jpg?imgmax=800)
![clip_image014[4] clip_image014[4]](http://lh3.ggpht.com/anyhelpinit/SGzA616DJBI/AAAAAAAAAlE/-ouXNDrbwGw/clip_image0144_thumb%5B4%5D.jpg?imgmax=800)
![clip_image016[4] clip_image016[4]](http://lh5.ggpht.com/anyhelpinit/SGzA8U6zN6I/AAAAAAAAAlM/5R3X8e-b5lA/clip_image0164_thumb%5B4%5D.jpg?imgmax=800)
![clip_image018[4] clip_image018[4]](http://lh3.ggpht.com/anyhelpinit/SGzA9yrrjdI/AAAAAAAAAlU/uH9klEnq8Y0/clip_image0184_thumb%5B4%5D.jpg?imgmax=800)
![clip_image020[4] clip_image020[4]](http://lh3.ggpht.com/anyhelpinit/SGzA_lKUkbI/AAAAAAAAAlc/lHeQRgGXL4k/clip_image0204_thumb%5B4%5D.jpg?imgmax=800)
![clip_image022[4] clip_image022[4]](http://lh4.ggpht.com/anyhelpinit/SGzBBFFzULI/AAAAAAAAAlk/qcpiK2U76Kc/clip_image0224_thumb%5B4%5D.jpg?imgmax=800)
![clip_image024[4] clip_image024[4]](http://lh3.ggpht.com/anyhelpinit/SGzBCzsXfPI/AAAAAAAAAls/NrBRF9gu8kI/clip_image0244_thumb%5B4%5D.jpg?imgmax=800)
![clip_image026[4] clip_image026[4]](http://lh5.ggpht.com/anyhelpinit/SGzBFJrwl8I/AAAAAAAAAl0/NveEyr4eEmE/clip_image0264_thumb%5B4%5D.jpg?imgmax=800)
![clip_image028[4] clip_image028[4]](http://lh3.ggpht.com/anyhelpinit/SGzBGisYnDI/AAAAAAAAAl8/YsgeEwgKHvg/clip_image0284_thumb%5B4%5D.jpg?imgmax=800)
![clip_image030[4] clip_image030[4]](http://lh4.ggpht.com/anyhelpinit/SGzBIP176uI/AAAAAAAAAmE/uxR6EB7RUF0/clip_image0304_thumb%5B4%5D.jpg?imgmax=800)
![clip_image032[4] clip_image032[4]](http://lh6.ggpht.com/anyhelpinit/SGzBKFHROHI/AAAAAAAAAmM/TKFdWFwp2h0/clip_image0324_thumb%5B9%5D.jpg?imgmax=800)
![clip_image034[4] clip_image034[4]](http://lh6.ggpht.com/anyhelpinit/SGzBLha7kfI/AAAAAAAAAmU/EG9Wn936WJA/clip_image0344_thumb%5B4%5D.jpg?imgmax=800)
![clip_image036[4] clip_image036[4]](http://lh4.ggpht.com/anyhelpinit/SGzBNrcpoYI/AAAAAAAAAmc/H44HJSbW8Z0/clip_image0364_thumb%5B4%5D.jpg?imgmax=800)
![clip_image038[4] clip_image038[4]](http://lh5.ggpht.com/anyhelpinit/SGzBPZRTHrI/AAAAAAAAAmk/nmSEwQpybMM/clip_image0384_thumb%5B4%5D.jpg?imgmax=800)
![clip_image040[4] clip_image040[4]](http://lh4.ggpht.com/anyhelpinit/SGzBRG0LfNI/AAAAAAAAAms/yGq4o18Ltf4/clip_image0404_thumb%5B6%5D.jpg?imgmax=800)
![clip_image042[4] clip_image042[4]](http://lh5.ggpht.com/anyhelpinit/SGzBSV1Pz1I/AAAAAAAAAm0/5kS1Wb-eRZ8/clip_image0424_thumb%5B4%5D.jpg?imgmax=800)
![clip_image044[4] clip_image044[4]](http://lh4.ggpht.com/anyhelpinit/SGzBT9QEouI/AAAAAAAAAm8/h6uU5HvTcLk/clip_image0444_thumb%5B4%5D.jpg?imgmax=800)
![clip_image046[4] clip_image046[4]](http://lh3.ggpht.com/anyhelpinit/SGzBVIX2JWI/AAAAAAAAAnE/gO1VjCMDnyY/clip_image0464_thumb%5B4%5D.jpg?imgmax=800)
![clip_image048[4] clip_image048[4]](http://lh6.ggpht.com/anyhelpinit/SGzBWrU37bI/AAAAAAAAAnM/q-ohvamaPr4/clip_image0484_thumb%5B4%5D.jpg?imgmax=800)
![clip_image050[4] clip_image050[4]](http://lh3.ggpht.com/anyhelpinit/SGzBYNzOILI/AAAAAAAAAnU/Vh2kKr0PpKA/clip_image0504_thumb%5B4%5D.jpg?imgmax=800)
![clip_image052[4] clip_image052[4]](http://lh6.ggpht.com/anyhelpinit/SGzBaHtFdEI/AAAAAAAAAnc/QMNFh_eHYWI/clip_image0524_thumb%5B4%5D.jpg?imgmax=800)
![clip_image054[4] clip_image054[4]](http://lh5.ggpht.com/anyhelpinit/SGzBb-GhuXI/AAAAAAAAAnk/CAI7hKfCXek/clip_image0544_thumb%5B5%5D.jpg?imgmax=800)
![clip_image056[4] clip_image056[4]](http://lh6.ggpht.com/anyhelpinit/SGzBdYuEH0I/AAAAAAAAAns/fhsX-VAoOkE/clip_image0564_thumb%5B4%5D.jpg?imgmax=800)
![clip_image058[4] clip_image058[4]](http://lh5.ggpht.com/anyhelpinit/SGzBe-WpkCI/AAAAAAAAAn0/8USrJnirE0E/clip_image0584_thumb%5B4%5D.jpg?imgmax=800)
![clip_image060[4] clip_image060[4]](http://lh3.ggpht.com/anyhelpinit/SGzBhHcOZ2I/AAAAAAAAAn8/ToiZu-OvFpg/clip_image0604_thumb%5B4%5D.jpg?imgmax=800)
![clip_image062[4] clip_image062[4]](http://lh6.ggpht.com/anyhelpinit/SGzBjOH1IsI/AAAAAAAAAe0/qfnX3zBc7zw/clip_image062%5B4%5D_thumb.jpg?imgmax=800)
![clip_image064[4] clip_image064[4]](http://lh4.ggpht.com/anyhelpinit/SGzBkgGN6mI/AAAAAAAAAoE/JRGuzm5VIOU/clip_image0644_thumb%5B3%5D.jpg?imgmax=800)
![clip_image066[4] clip_image066[4]](http://lh3.ggpht.com/anyhelpinit/SGzBmMGiuzI/AAAAAAAAAoM/q6ZwgFHZqcI/clip_image0664_thumb%5B3%5D.jpg?imgmax=800)
![clip_image068[4] clip_image068[4]](http://lh5.ggpht.com/anyhelpinit/SGzBnw-hP9I/AAAAAAAAAoU/zR1OAEtmHSU/clip_image0684_thumb%5B2%5D.jpg?imgmax=800)
![clip_image070[4] clip_image070[4]](http://lh4.ggpht.com/anyhelpinit/SGzBqK97QZI/AAAAAAAAAoc/gzg1kuKX-d0/clip_image0704_thumb%5B4%5D.jpg?imgmax=800)
![clip_image072[4] clip_image072[4]](http://lh6.ggpht.com/anyhelpinit/SGzBrmOv5nI/AAAAAAAAAok/z8Uu-e57kg8/clip_image0724_thumb%5B3%5D.jpg?imgmax=800)
![clip_image074[4] clip_image074[4]](http://lh5.ggpht.com/anyhelpinit/SGzBtO3EOMI/AAAAAAAAAos/JbBkdf-1sF0/clip_image0744_thumb%5B3%5D.jpg?imgmax=800)
![clip_image076[4] clip_image076[4]](http://lh6.ggpht.com/anyhelpinit/SGzBu8RW7rI/AAAAAAAAAo0/lLM-XkPgKqQ/clip_image0764_thumb%5B4%5D.jpg?imgmax=800)
![clip_image078[4] clip_image078[4]](http://lh5.ggpht.com/anyhelpinit/SGzBxErMkOI/AAAAAAAAAo8/PwaU5nzAcFg/clip_image0784_thumb%5B4%5D.jpg?imgmax=800)
![clip_image080[4] clip_image080[4]](http://lh4.ggpht.com/anyhelpinit/SGzBzHBHaTI/AAAAAAAAApE/0VX_gDYTQik/clip_image0804_thumb%5B4%5D.jpg?imgmax=800)
![clip_image082[4] clip_image082[4]](http://lh4.ggpht.com/anyhelpinit/SGzB0bUiaSI/AAAAAAAAApM/fWBsgBmYCGQ/clip_image0824_thumb%5B7%5D.jpg?imgmax=800)
![clip_image084[4] clip_image084[4]](http://lh3.ggpht.com/anyhelpinit/SGzB2Pj2jQI/AAAAAAAAApU/OrkIczW0MxE/clip_image0844_thumb%5B4%5D.jpg?imgmax=800)
![clip_image086[4] clip_image086[4]](http://lh3.ggpht.com/anyhelpinit/SGzB3h5AReI/AAAAAAAAApc/EO-svA4Sab0/clip_image0864_thumb%5B4%5D.jpg?imgmax=800)
![clip_image088[4] clip_image088[4]](http://lh5.ggpht.com/anyhelpinit/SGzB5bOHtsI/AAAAAAAAApk/OdSQ8WAwpxo/clip_image0884_thumb%5B4%5D.jpg?imgmax=800)
![clip_image090[4] clip_image090[4]](http://lh4.ggpht.com/anyhelpinit/SGzB6848WxI/AAAAAAAAAps/8J3PR8r1yog/clip_image0904_thumb%5B4%5D.jpg?imgmax=800)
![clip_image092[4] clip_image092[4]](http://lh4.ggpht.com/anyhelpinit/SGzB8T8mm3I/AAAAAAAAApw/mcxXu1OWlmI/clip_image0924%5B4%5D.jpg?imgmax=800)
![clip_image094[4] clip_image094[4]](http://lh6.ggpht.com/anyhelpinit/SGzB9wbiI6I/AAAAAAAAAp4/ZWh1e8yMC-c/clip_image0944_thumb%5B4%5D.jpg?imgmax=800)
![clip_image096[4] clip_image096[4]](http://lh4.ggpht.com/anyhelpinit/SGzB_rDFccI/AAAAAAAAAqA/fnE-bdWEy0Y/clip_image0964_thumb%5B4%5D.jpg?imgmax=800)
No comments:
Post a Comment