The various steps involved in creating certificate to enable secure data transmission are as follows. Windows Server 2003 is the base OS here used to create the certificate.
Firstly the pre-requisites necessary are IIS and Certificate Services. Both of these can be installed through “Windows Component Wizard” of Add or Remove Programs. Here is how we install Certificate Services as most of you are aware of installing IIS.
1) Installing Certificate Services
a) Open Add or Remove Programs and click Add/Remove Windows Components from the left Pane. Windows Components Wizard is opened. In the wizard check the box next to Certificate Services.
When Certificate Services check box is checked, a warning window is popped up saying that once certificate services are installed the computer name and domain cannot be changed. Click OK on the popup window and press next.
b) The next windows displays different type of CA’s available. Select “Stand-alone root CA” which is the most trusted CA in the CA Hierarchy. Click next.
c) Give a common name for the CA. Its better to give any unused name in the domain rather than replacing the already created CA name. Click next.
d) Give or Accept default settings for certificate Database settings which include database log location. Click next and a warning window is popped up saying that IIS is temporarily stopped. Click OK on the popup window.
e) Installation of Certificate Services is started and it prompts for I386 folder location. Specify the I386 folder location and press OK. In the process of installation a warning popup window is displayed stating that Active server pages(ASP’s) need to enabled which is a security risk. Click Yes and Proceed.
f) The installation of Certificate Services is Completed. Click on the Finish Button in the Last Window.
2) The next step in creation of certificate is to Create Request File using IIS Manager.
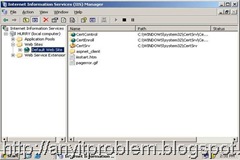
a) Open IIS Manager from Administrator tools. Now, Expand the tree and Select “Default Web Site” as shown.
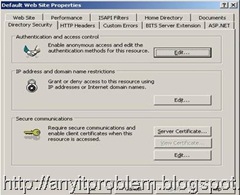
b) Right Click on “Default Web Site” and Select properties. New window is opened with “Default Web Site Properties” title. Select “Directory Security” tab as shown.
c) In the new wizard, select “Server Certificate” under Secure Communications. New certificate wizard is opened as shown.
d) Select next in the welcome page that leads to the window consisting of different methods as shown.
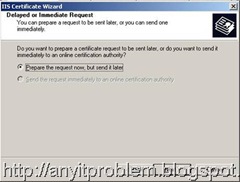
e) Select “Create a new certificate” from the options provided for a new certificate and Select next. In the next window, select “Prepare the request now, but send it later” option and select next as shown.
f) The new page talks about the certificate name and the bit-length of the certificate. Any name can be given and generally default bit length is accepted.
g) Give any name and select next. The next page needs information about organization name etc. Enter the required info and select next.
h) The next page requires the info about Common Name. The name provided here should be the Computer Name that uses the certificate. By default machine name is provided. Click next after you give the machine name.
i) The next window requires info about Geographical information. Fill in necessary fields and press next.
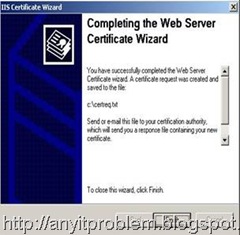
j) The process we followed till now is to create the Request file. The coming window requires the info as to where to place the request file. Select any drive in the machine. Remember the location of the file as it is used to create the certificate.
k) The next two windows of the wizard are the Summary pages and you just need to click next and finish on the next two windows.
As the Request File is ready, the next step is to request “Certificate Authority” for a Certificate. This process is as follows.
3) Launch Certificate Authority from the administrative tools. This function will not be available if Certificate Services are not installed as described in the Step 1.
a) In the Certificate Authority, select the root node, right click on it and select All Tasks.Submit new request as shown.
b) The request file created in the previous step needs to be provided here. Browse and provide the requested *.txt file created as shown.
c) Expand the root node and select “Pending Requests” from the left Pane. In the right pane, the list of all requests will be available.
d) Right Click on the Request and select “All Tasks->Issue” as shown.
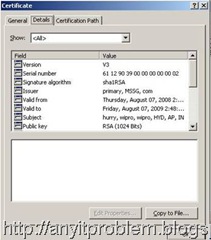
e) In the left pane, select “Issued Certificates”. This lists all the requests that are issued in the right Pane. Right click on the issued request and select Open. The following certificate is opened.
f) Select “Copy to File” option in the opened certificate window. A “Certificate Export Wizard” is opened that is used to export the certificate to the required location.
g) Click next on the welcome screen and the next window describes about the format of the certificate that we want to use. Select the default option and select next.
h) The next window requires the location and name to export the certificate. The certificate created will be placed in that location. Click next.
i) The next Window is the summary window and click “Finish” to complete the wizard. The certificate will be successfully imported to the specified location.
4) The next step is to add the certificate to the system. This process relates to installing the certificate in the system and to provide the SSL port that is needed for secure data transmission.
a) Open IIS Manager from administrative tools and expand the root node to select “Default
Web Site”. Right click on “Default web Site” and Select properties as described earlir.
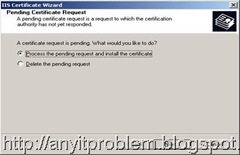
b) Now, select “Server Certificate” option under “Directory Security” tab and click next on the welcome screen as described earlier. The next window talks about processing the request and installing the certificate as shown.
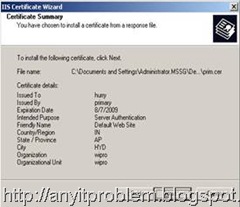
c) Select the default option “Process the pending request and install the certificate” and click next. The next window prompts for the location of the created certificate(*.cer) file that was created in the previous step. Browse and select the certificate as shown.
d) After selecting the certificate click next. The next window displays the port used for secure communication. Generally default value is accepted and is 443. Click next.
e) The next two screens are summary and finish windows. Just click next and finish to complete the wizard.
f) The certificate is installed in the system and is ready to use. The certificate can be customized for any particular application.
Author : Tarun Puttagunta (tarun5125@gmail.com)
About Author : Tarun is working for an MNC and has worked on latest Windows Operating System such as Vista and Windows Server 2008. Has in depth knowledge on the OS concepts/Test Automation. Has a total industry experience of about 24 months.
Please post your comments/suggestions on the writeup. Any information, please write to anyhelpinit@gmail.com













No comments:
Post a Comment